
How To Repair Plaster Ceiling Cracks | Sagging In 2021
Repair a plaster Cracking and Sagging ceiling is not as difficult as it may seem. I’ll show you How To Repair Plaster Ceiling Cracks and the best ways to deal with the four major issues with plaster easily. Read our blog to learn the right way.
Which owner of an old house has no sagging or cracking plaster ceiling in need of repair anywhere? They can only make so many structural movements or leaks before moving away from framing. Plaster-and-lath ceilings are at the mercy of gravity, as well as living tears and plain clothing. Even
The good news is, any damaged sagging or cracking plaster ceilings can be repaired and recovered. We have already successfully reconnected the glue between the lath and the plaster by injecting it into many old ceilings, where over time the keys (anchors) have broken.
Let us share those methods with you today. Moreover, it is possible to restore the integrity of these two methods and good equipment efficiency if you wish.
We already know that the report will show two types of ceiling blessing activities. So first we look at the sagging plaster repair work.
How to repair plaster ceilings: Sagging Plaster
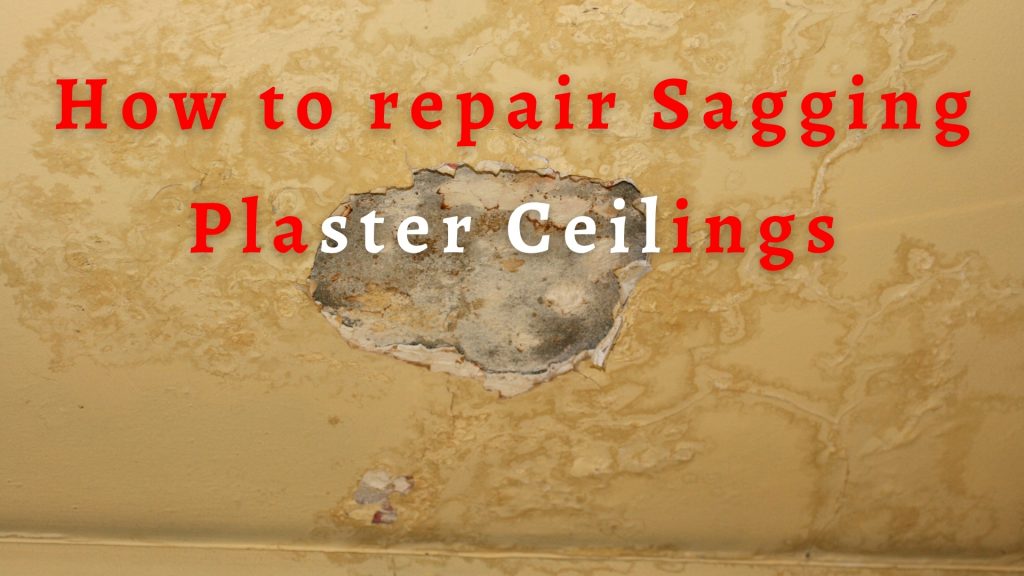
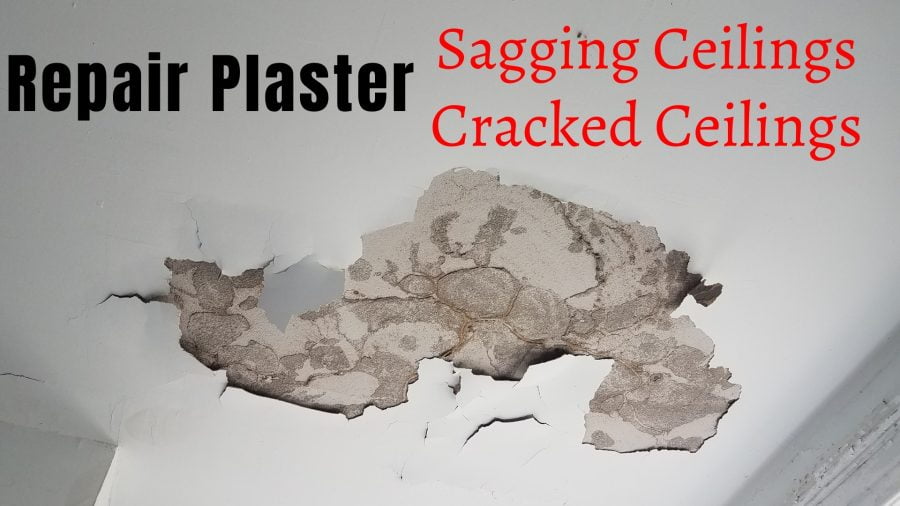
Usually flaking plaster cracking plaster is a relatively small repair item. But when the plaster starts to peel out or hangs from the ceiling or wall, it can indicate a deeper problem.
A well-anchored base will be needed to support the weight of your heavy plaster. These bases are usually strips of metal wire mesh (both referred to as laths) or wood that is nailed to the ceiling framing. And when plaster is applied to it, it shrinks through the lath. Later the “keys” are formed and form a strong inseparable bond with the wall.
Over the years, the plasters may weaken or the keys begin to break. Once dried it can lose its holding capacity from vibration. Not only that, but the lath can also pull from the framing, and then the plaster surface collapses. However, the first mark is often packaged and the gravity and weight of the plaster apply themselves.
And at that moment, you can call a professional and take the service. As the ceiling began to collapse, however, large wall areas became difficult enough to repair. If, however, heavy ceilings work on your ceiling head with hard-to-handle materials, this may not be an easy task.
So, Now I’ll show You How to repair Sagging Plaster ceiling? Or, Want more know about How To Clean Ceilings Quickly And Safely
First step
First place a sheet to protect the floor below you in the work area. Because once you start, dirt can spread all over the affected area. Plaster dust will spread to the rest of the house, so hang a sheet of taped plastic or a damp sheet over the door of your room and install an exhaust fan on a window if you can.
If you fear that many ceilings may fall at once, make a 2 by 4 piece of plywood T-shaped support. And use those pieces of wood against the ceiling when you work to hold them.
Second step
Use a racking bar or cold chisel and a hammer to chip a small spot on the edge of the bulge (it may hurt the eyes at that time, so wear safety goggles). Once you look behind the surface, you will notice that the lath itself has loosened from the framing or moved away from the plaster lath.
But if the plaster is still mixed with it or the lathe has already been removed, you can re-lick the lathe for framing without removing the plaster.
Third step
Use a long drywall screw that can penetrate at least half their length into the wooden frame. To get started, press the ceiling upwards while approaching the edge of the bulge and keep the screws in place (hold it with the plywood you support as the tee works as you do).
This is because the lath and plaster can go back without any problems and form an integral sheet such as a dry piece. However, if the old nail in the frame prevents the lath from returning to its original position or if the lath is warped, it may prove impossible. Then to back up the lath, you may need to remove all the plaster first.
Fourth Step
If you see that there are still many anchors in the lath or ceiling joists and the plaster is pulled away, your only option is to remove the old plaster. However, if there is nothing to hold the plaster in the framing, it will come down quickly, although it is a dirty job.
Professionals have used another technique to repair plaster ceilings or walls that failed. So you leave the old plaster in one place and repair the whole area again with the new drywall. Use the framing of the long screws with the washer head to pull the old ceiling again or use the drywall as close to the level as possible.
Then you finish with a dry surface finish. Anyway, hopefully, this will help eliminate the problems of sagging, cracking, and flaking plaster for everyone!
Note: If you Want Know About How To Clean Mold Off Ceiling? | Stop The Mold Growth
How to repair plaster ceiling: Cracked Plaster
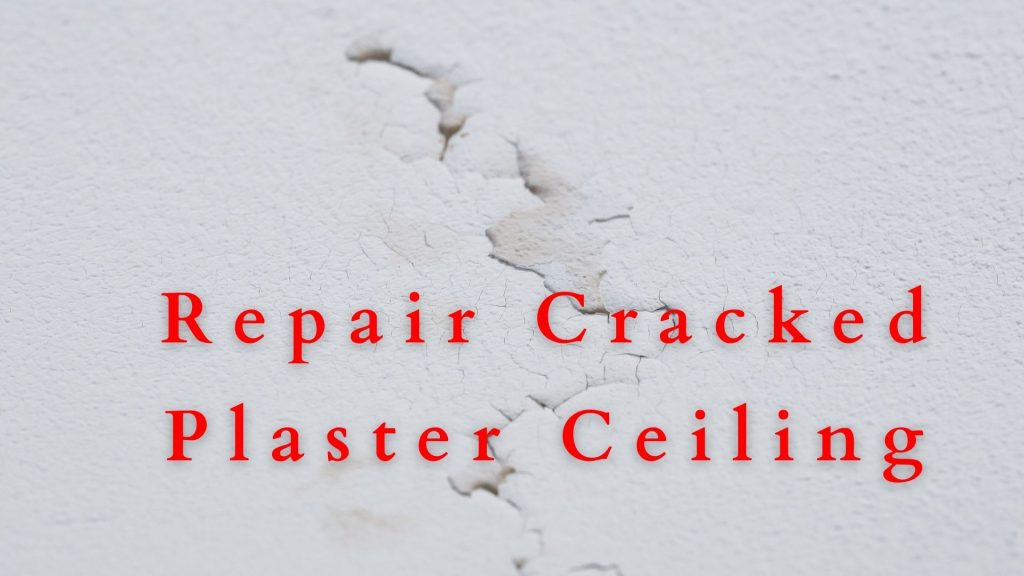
Although it will be easier than sagging, so let’s look at the repair activities according to the number!
- Measure the length and width of the area in need of repair. Cut the window screen material to those dimensions with a pair of scissors. Set the screen to one side.
- Drill a hole in the middle of the plaster washer with a drywall screw. Then place the tip of the screw next to a damaged area in the plaster. Using a screwdriver with screwdriver bits, the screw can ensure its safety in the plaster or the lath behind it
- Secure the damaged area with screws to the loose drywall plaster to the lath.
- Open a container of a premixed compound. using a little trowel, Place a sufficient amount of the premixed joint compounds in a lightning bolt to cover it using a little trowel.
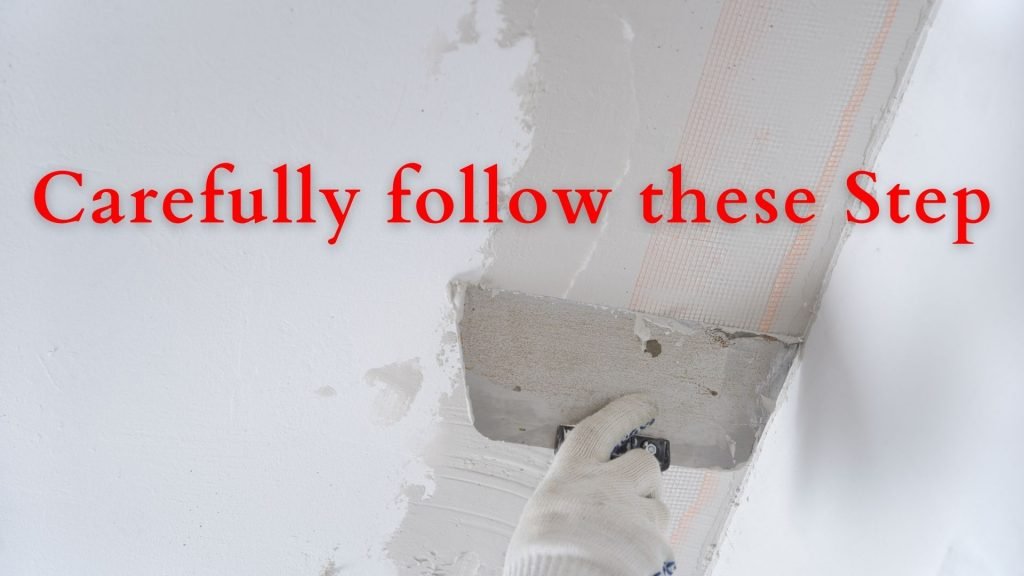
- Spread the premixed compound on the ceiling using a trowel. Work by plaster washer as well as the compound behind all the cracked areas needed for repair. And smooth the compound as much as possible.
- Now press the window screen elements into the wet joint compound. Using a trowel again, smooth the wrinkles one by one, then let it dry for at least 24 hours.
- Remove all uneven edges with 100-grit sandpaper from the repaired area. Any dust will remain with the tack cloth.
- Coat the repaired area again, if uneven in the first layer.
- To blend with the undamaged ceiling plaster, then feather the outer edges of the repaired area with a further thin coat of attached compound. Then let it dry for at least 24 hours. Sand any rough edges with 100-grit sandpaper. Then use any tack cloth to remove the remaining dust.
- Cover the repaired area with a primer or the entire ceiling main. Allow it to dry following the time recommended by the manufacturer. Paint with two primer coat paints (use double coat below). To apply the next coat again, let the first coat of paint dry.
Note: If you Want Know About What Color To Paint Ceiling/Walls? | When Should Do It?
FAQ: How to repair plaster ceiling?
Can you paint on damaged plaster?
Painting filler materials on top of repaired plaster can hide patching compounds. But the paint itself is not intended to mask the damaged plaster. Remember, matching old colors to the ceiling or wall can cost you a little bit. So call a plaster repair specialist for an even finish to find the best colors.
Should you replace the plaster with drywall?
The drywall is often easier to repair when needed, the plaster does not eat the mold growth of the drywall and is much stronger than that. Especially if the plaster includes detailed crown plaster medallions, molding, and more, plaster can even increase the value of your home.
How long does it take to repair a plaster ceiling?
Keep in mind that not only is the nail given to the wooden studs, but the plaster is applied or applied layer by layer. Once the plaster ceiling repair work is done, take a few days later depending on the amount of damage. Because any repairman can add these layers individually.
When to call a specialist to repair plaster?

We have seen homeowners often repair minor cracks in their plaster on their own. And it is good for you to know when to call a specialist for plaster repair.
If a large portion of the plaster is already packaged, call a contractor to repair it. Again when a large portion of the plaster moves away from the wooden lath behind it, and the weight of the stucco may crash if you go to work repairing it yourself.
Experts can also recreate the details of decorated plaster pieces such as crown plaster medallions, molding. Don’t assume again that you can only create a decor in a repaired place of plaster. Rather retrieving these details requires quite a bit of skill and experience.
Recovery experts, on the other hand, create casts or molds of these details for this exact copy. Make sure the valuable plaster details of your home are preserved. And if that decorative section or piece needs more repair then you can call a recovery specialist.
The final thought: How to repair plaster ceiling?
Hopefully, this post has given you some encouragement that you can do two of your plaster repairs (cracking, sagging) as a DIY. You can get all the supplies you need to repair old plaster at the store next to you. We are always here to support you if you need any help or assistance.
If you are still unsure or afraid to do so, consider joining Paterson yourself.
IF YOU LIKED THIS POST, YOU MIGHT ALSO BE INTERESTED IN:
How To Paint A Ceiling Fan Without Taking It Down In 2021
How To Clean Greasy Ceiling Fans In 2021


Very effective guide for beginners
thank you so much dear,
stay with us for exciting upadte
Such an informative article! All the information provided by you is really very helpful. By using tack cloth you can easily remove small dust particles from the surface and it also gives you smooth finishing. Thank you for sharing! Keep posting!
Sure… and i love to share my experience to ohters